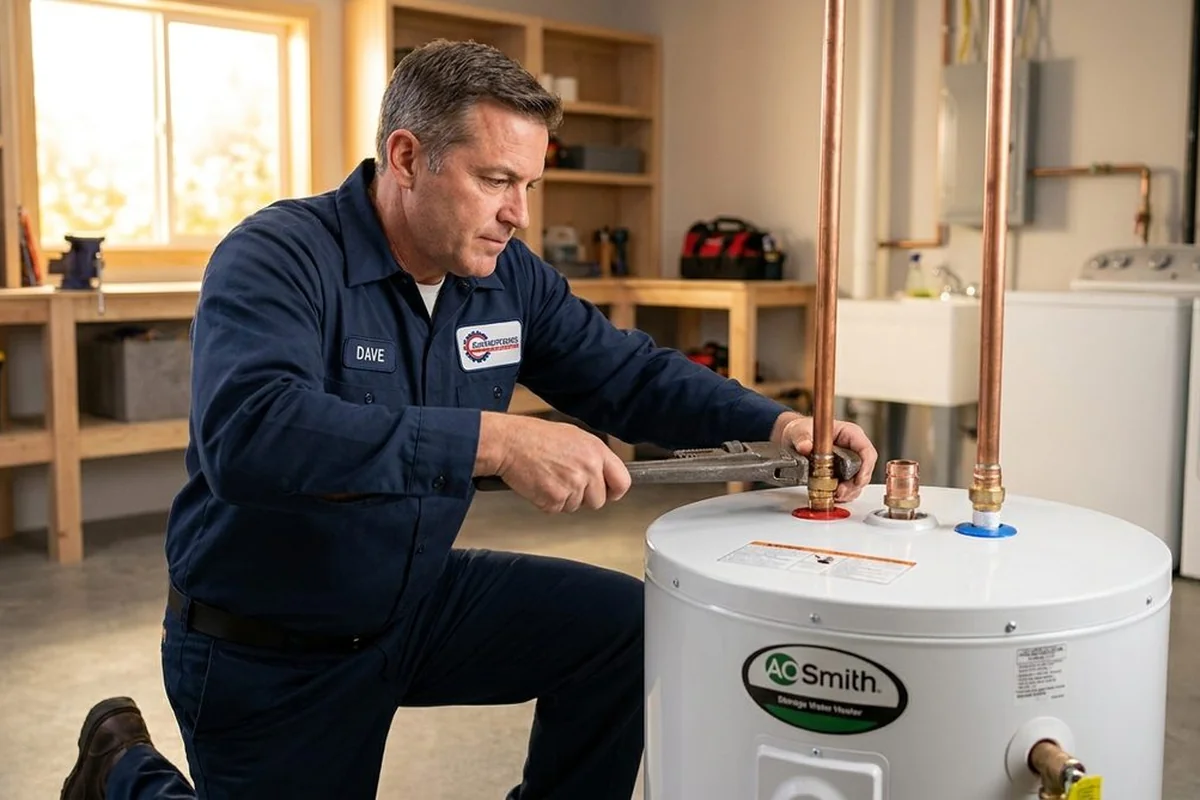
["Every water heater has a lifespan, and in Medford's older housing stock, a remarkable number of them are living past it. Tank water heaters typically last 8 to 12 years; beyond that, corrosion advances, efficiency falls, and the risk of a tank failure — the kind that releases 40 or 50 gallons onto your basement floor — climbs every year. Knowing when to stop repairing and start replacing is one of the most valuable judgments a homeowner can make.", "The repair-versus-replace decision is not just about age. A five-year-old heater with a failed thermostat deserves a repair. A fourteen-year-old heater with a weeping seam, rust-colored water, and a rumble like a coffee percolator deserves retirement. Between those poles lies a gray zone where honest math decides: the cost of the repair, the heater's remaining life expectancy, and the cost of the water damage if an aging tank lets go while you are deliberating.", 'Replacement done right is more than swapping one tank for another. It means sizing the unit to the household, choosing the right fuel and venting for the home, controlling thermal expansion, protecting finished space with a pan, and testing everything before the technician leaves. This page walks through the signs that replacement is due, the installation process step by step, the materials involved, the safety rules, and the Medford-specific realities — from narrow basement stairs to old masonry chimneys — that shape replacements here.']
Signs It Is Time to Replace Rather Than Repair
Some water heaters fail suddenly. Most send warnings for months first. Here are the signs that replacement — not another repair — is the right call:
- Age past 10 to 12 years. Check the manufacture date on the rating plate. A heater in its second decade is on borrowed time regardless of how it looks.
- Rust-colored hot water. Discolored water from hot taps only means the tank's interior is corroding — the anode rod is exhausted and the steel is next.
- Water seeping from a seam or the tank base. Fitting leaks can be repaired; a breach in the tank wall cannot. Seam weeping is the definitive end-of-life sign.
- Rumbling, popping, or banging. Hardened sediment at the tank bottom superheats and erupts through the water layer. Beyond noise, it overheats the tank bottom and accelerates failure.
- Repeated repairs. A new thermostat one year, a new element the next, a relief valve after that — when components fail in sequence, the tank is telling you the system is worn out as a whole.
- Water never gets hot enough. Chronic underperformance in an old tank often means heavy sediment displacement or failing internals that no single part swap will cure.
- Visible corrosion on the jacket. Rust streaks, blistered paint, or a corroded base are the outside reflecting the inside.
- Rising energy use. A sediment-insulated, scale-coated old tank works harder for every gallon — and the utility bill shows it.
The causes behind these symptoms are the ordinary physics of a steel tank full of hot water: the glass lining develops micro-cracks, the anode rod sacrifices itself and eventually depletes, and then the steel begins to corrode. Sediment accelerates the process by insulating the bottom and creating hot spots. Hard winter duty — long heating cycles against near-40-degree inlet water — adds thermal stress year after year.
The decision framework is simple: if the tank is young and the problem is a component, repair it. If the tank is old and the problem is the tank — corrosion, seam leaks, systemic wear — replace it. Money spent repairing a dying tank is money subtracted from its replacement.
The Replacement Process, Step by Step
A professional water heater replacement follows a careful order. Rushed installs skip the testing steps — and the testing steps are what separate a safe installation from a hazardous one.
Step 1: Assessment and sizing
The technician evaluates the existing setup — fuel type, venting, water connections, space constraints — and sizes the replacement to the household: tank capacity and first-hour rating matched to actual hot-water routines, not just the old unit's label.
Step 2: Permits and preparation
In most Massachusetts municipalities, water heater replacement requires a plumbing permit and inspection. The technician confirms local requirements, lays drop cloths, and stages the new unit, tools, and materials before touching the old heater.
Step 3: Shutdown and drain-down
The old heater is shut down — water inlet closed, breaker off or gas control off — and drained through a hose to a safe drainage point. Gas lines are capped safely during the transition.
Step 4: Disconnection and removal
Water lines, the gas line or electrical wiring, the vent connector, and the TPR discharge are disconnected. The old tank is maneuvered out — often the most physically demanding part of the job in Medford's older homes — and staged for haul-away and recycling.
Step 5: Site preparation
The installation area is cleaned and inspected. A new drain pan is set and leveled where the heater sits above finished space or where protection is warranted. The floor is checked for level; shims correct any tilt.
Step 6: Setting and connecting the new unit
The new heater is positioned, leveled, and connected: cold and hot water lines with dielectric unions to prevent galvanic corrosion, an expansion tank on closed plumbing systems, a new TPR valve with proper discharge piping run to near the floor, and venting with correct pitch and materials for the fuel type. Gas connections get a sediment trap and a leak test with detection solution — never a flame.
Step 7: Fill, purge, and start up
The tank is filled with air purged through the hot-water taps until the flow runs solid. Then the heater is energized or the pilot lit according to manufacturer procedure. For gas units, combustion is verified; for electric, both elements are confirmed cycling correctly.
Step 8: Testing and walkthrough
Every joint is checked for leaks, the TPR valve is function-tested, water temperature is verified at the tap, and the expansion tank's charge is confirmed. The technician walks the homeowner through the new unit: the temperature setting, the shutoff locations, the maintenance schedule, and what to watch for.
Equipment and Materials for Replacement
A complete replacement involves more parts than just the tank. The standard material list:
- New water heater — sized to the household, with the correct fuel type, capacity, and efficiency rating for the home.
- Expansion tank — required on closed plumbing systems to absorb thermal expansion; pre-charged to match house water pressure.
- TPR valve and discharge piping — new with every install, never reused; discharge run full-size to near the floor.
- Dielectric unions — isolating dissimilar metals at the water connections to prevent galvanic corrosion.
- Copper or PEX pipe and fittings — for adapting the new unit's connections to the existing plumbing.
- Vent pipe and fittings — correctly sized and pitched for atmospheric or power-vented gas units.
- Drain pan and water alarm — where the heater sits above finished space.
- Gas sediment trap, pipe joint compound, thread sealant tape — for safe, leak-free gas connections.
- Appliance hand truck, straps, hose, buckets, drop cloths — for the removal and the protection of the home during the work.
Reusing the old TPR valve, skipping the expansion tank, or adapting venting with whatever is on the truck are the shortcuts that distinguish a cheap install from a correct one. Every item above earns its place.
Safety Rules for Water Heater Replacement
Water heater replacement combines heavy lifting, gas or high-voltage electricity, scalding water, and combustion venting. The safety rules cover all four:
- Gas connections are leak-tested, never flame-tested. Every gas joint is checked with detection solution or a sniffer after assembly. The old habit of checking with a match is exactly as dangerous as it sounds.
- Venting must be correct, not convenient. Gas exhaust has to pitch upward, use approved materials, and terminate safely. Improper venting sends carbon monoxide into the home — silent, odorless, and lethal. A CO detector near the installation is standard good practice.
- Electrical work follows the breaker. On electric units, the dedicated 240-volt circuit stays off until all wiring is complete and verified. Wire gauge must match the element load.
- Never reuse the old TPR valve. The relief valve is life-safety equipment with a finite life. Every replacement gets a new one, rated and tagged.
- Control the old tank's water. Draining 40 to 50 gallons needs a planned destination — a floor drain, laundry sink, or exterior point — not a hope and a hose out the basement window onto a neighbor's walk.
- Lift with equipment and help. Old tanks full of sediment are brutally heavy. Hand trucks, straps, and two people are the minimum for basement stairs.
- Fill before firing. An electric heater energized before the tank is full destroys its elements in seconds; a gas heater fired dry damages the tank. Water first, heat second — always.
These are the rules a professional follows without thinking about them. They are also the checklist a homeowner can use to judge whether an installation was done properly.
Medford Realities That Shape Replacements
Replacing a water heater in Medford involves the city's housing stock as much as its plumbing. Local realities shape every installation.
Century-old basements complicate the carry. The triple-deckers of South Medford and the colonials near Medford Square were built when water heaters were smaller and basements were accessed by steep, narrow stairs with tight turns. Getting a modern 50-gallon tank down — and the dead one up — is often the hardest part of the visit. Technicians measure stairwells and doorways before the new unit is even loaded, because a tank that does not fit through the bulkhead is a problem discovered too late.
Old masonry chimneys need evaluation. Many Medford homes vent gas water heaters into original brick chimneys. Decades of flue gases deteriorate masonry from the inside, and an oversized, unlined chimney can fail to draft properly — spilling combustion gases into the basement. Replacement is the moment to assess the chimney: relining or switching to a power-vented unit that vents through the wall are the standard solutions when the old chimney cannot do the job safely.
High municipal pressure means expansion tanks. Medford's MWRA-fed water system delivers strong pressure, and many homes have pressure-reducing valves that create closed plumbing systems. On a closed system, a new water heater absolutely needs an expansion tank — without one, every heating cycle spikes pressure until the TPR valve weeps or a fitting gives. Any replacement quote in Medford that omits the expansion tank on a closed system is incomplete.
Soft water extends tank life — up to a point. The naturally soft, low-mineral MWRA water Medford drinks is gentler on tanks than hard water: less sediment, less scale, slower bottom corrosion. Medford tanks often reach the upper end of the 8-to-12-year range. But soft water does not stop anode depletion or the eventual corrosion of steel, so age limits still apply — they are just a little more generous here.
Winter scheduling matters. Nobody wants to be without hot water during a January cold snap, which is when marginal heaters most often fail — the season of maximum thermal stress. Proactive replacement in fall, when a 12-year-old tank is already showing symptoms, beats an emergency midwinter swap. Technicians here advise planning the replacement on your calendar rather than letting the tank choose the date.
Fuel realities in Medford homes. Natural gas and electricity are the common water-heating fuels across the city, with some older homes still on oil-fired systems. Each fuel has its venting and infrastructure implications — gas needs safe exhaust, electric needs adequate panel capacity — and the replacement plan accounts for what the house already has. Fuel conversions are possible but add meaningful cost and are weighed openly against staying the course.
Permits and inspections are the norm. Most Massachusetts municipalities require a plumbing permit for water heater replacement, with an inspection to verify safe installation. Professional installers handle the permit as part of the job. It protects the homeowner twice: the work gets a second set of eyes, and the installation is documented for insurance and resale.
Replacement Questions From Medford Homeowners
These are the questions Medford homeowners ask most when facing a water heater replacement — how long tanks last here, what size to buy, whether to change fuel types, and what the installation day looks like. If your heater is past its prime and you are weighing repair against replacement, call (833) 713-2101 and describe the unit's age and symptoms; a local pro can usually give you a straight answer on which path makes sense.