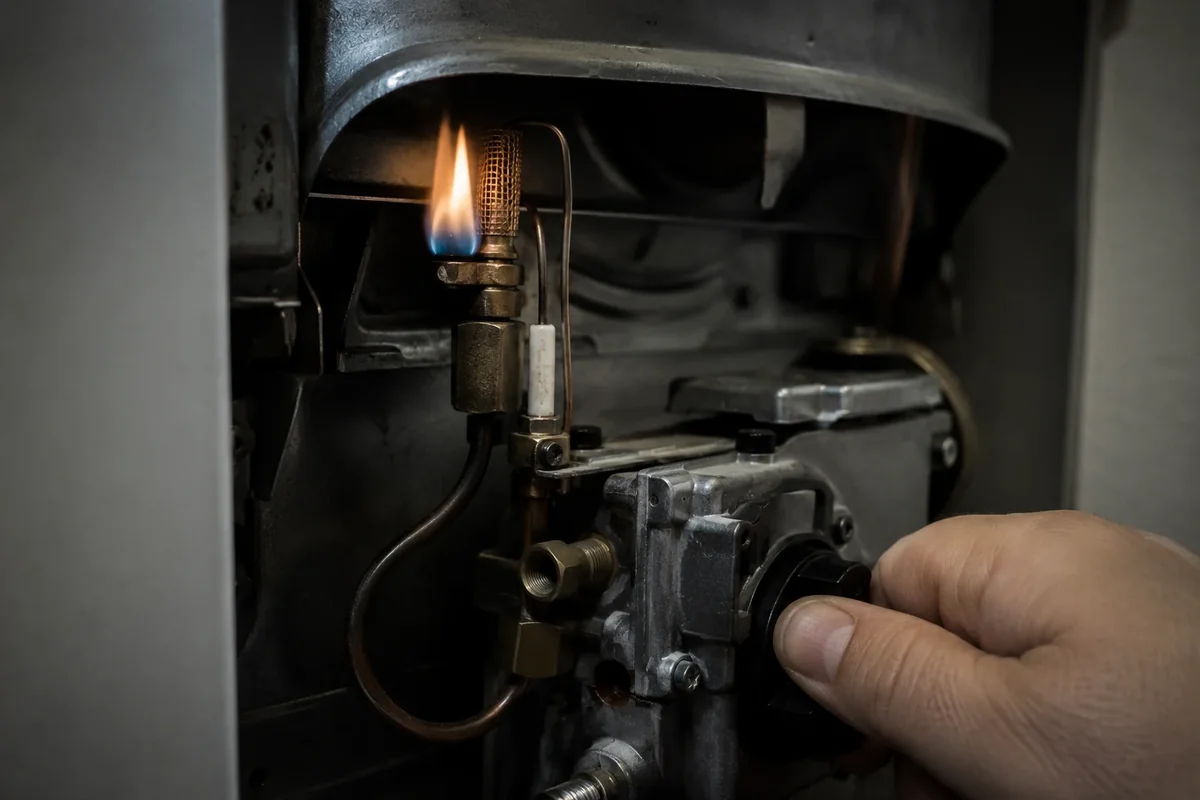
The gas control valve is the brain of a gas water heater. Mounted low on the front of the tank, it does three jobs at once: it meters gas to the burner, it holds the water at the temperature set on its dial, and it manages the pilot light through a thermocouple safety circuit. When it works, you never think about it. When it fails, the symptoms are unmistakable and sometimes alarming: a pilot that will not stay lit, a burner that never fires, water that scalds without warning, or a status light blinking an error code no one in the house can decode.
Diagnosis matters more with this part than with almost any other on the heater, because the gas valve is frequently blamed for failures that belong to cheaper components. A pilot that keeps going out is more often a weak thermocouple than a bad valve. A burner that will not fire can be a clogged pilot orifice or a tripped thermal cutoff. Replacing the valve without testing first is an expensive guess, which is why our technicians diagnose the full gas train, thermocouple output, pilot assembly, and valve function, before recommending replacement.
We replace faulty gas control valves on tank water heaters throughout Medford, MA 02155. The job involves gas piping, so it is handled with strict shutoff, leak-testing, and relight procedures on every call. Below are the failure signs to watch for, the diagnostic and replacement process, the parts we install, and the safety precautions that govern gas work.
Signs Your Gas Control Valve Is Failing
The most reported symptom is a pilot light that will not stay lit. You relight it, it burns for a few minutes or a few hours, and then it is out again. While a weak thermocouple is the more common cause, a failing gas valve can also drop the pilot by failing to hold the safety magnet open, and the two are distinguished by testing the thermocouple's millivolt output. If the thermocouple tests strong and the pilot still will not hold, the valve is the suspect.
A burner that never fires is the next classic sign. The pilot is lit and steady, the thermostat is calling for heat, and nothing happens. No rumble of the burner, no hot water recovery. This points to the valve's internal thermostat or gas-metering mechanism failing to open the main burner port. The reverse failure also occurs: a valve stuck in the open position that overheats the water, sending scalding water to every tap in the house. That is a safety failure, and the heater should be shut down until it is diagnosed.
Modern gas valves with electronic ignition or status lights add diagnostic blink codes to the picture. A common pattern is a set number of flashes, pause, repeat, and each pattern maps to a fault: thermocouple failure, high-temperature lockout, or an internal valve fault. Physical signs matter too: corrosion on the valve body, a gas odor near the valve, or a thermostat dial that turns with no effect on water temperature. Any of these, confirmed by testing, justifies replacement.
Diagnosis and Replacement, Step by Step
Because the valve is often innocent, our process starts with proving guilt. Only after diagnosis confirms the valve do we proceed to replacement:
- Full gas-train diagnosis. We check the thermocouple or thermopile output with a meter, inspect the pilot assembly and orifice for blockage, read any status-light blink codes against the manufacturer's chart, and test whether the valve holds the pilot and opens the burner on demand. A strong thermocouple with a dead valve means the valve is the problem; a weak thermocouple means a smaller repair.
- Gas and water shutoff. The gas supply is shut off at the heater's gas cock and verified, the cold-water supply to the tank is closed, and pressure is relieved through a hot tap and the temperature-pressure relief valve.
- Drain below the valve. The gas valve sits low on the tank, so the water level must be dropped below it. The tank is drained through the drain valve into a hose routed to a safe discharge point.
- Disconnect the gas train. The gas supply line, pilot tube, and thermocouple are disconnected from the valve, with each connection labeled so reassembly is exact.
- Remove and replace the valve. The old valve is unthreaded from the tank. The replacement, matched to the heater's model, BTU rating, and thread size, is threaded in with pipe joint compound rated for gas service and tightened to specification.
- Reconnect, leak-test, and relight. The gas line, pilot tube, and thermocouple are reconnected, and every disturbed joint is tested with leak-detection solution under gas pressure. Only then is the tank refilled, the pilot lit, and the burner observed through a full heating cycle to confirm proper operation and draft.
The Valve and Materials We Install
The replacement valve is never a generic part. Gas control valves are model-specific: the thread size into the tank, the BTU input rating, the thermocouple or thermopile connection type, and the ignition system must all match the heater. Common manufacturers include Honeywell, White-Rodgers, and Robertshaw, and each uses its own connection standards and diagnostic codes. We source the correct valve for your exact heater model, along with a new thermocouple, since it is false economy to reinstall a worn thermocouple on a new valve.
For the gas connections, we use pipe joint compound rated for natural gas service, never standard Teflon tape alone on gas threads, applied to the tapered pipe threads of the gas supply connection. The tank threads get a potable-water-rated sealant. Leak-detection solution, essentially a professional-grade soapy solution, is used to test every joint under pressure; even a tiny bubble formation means the joint comes apart and is remade.
The diagnostic toolkit is as important as the parts: a multimeter for thermocouple millivolt readings, manometer readings where supply pressure is suspect, and the manufacturer's blink-code charts for electronic valves. The goal of all this specificity is simple: the new valve must behave exactly as the heater's design intends, holding the pilot safely, firing the burner on demand, and shutting everything down if the pilot is lost.
Safety Precautions for Gas Valve Work
Gas work has the least margin for error of any water heater repair, and our precautions reflect that. The gas supply is shut off at two points, the heater's gas cock and, where accessible, the supply valve, and the absence of gas flow is verified before any fitting is loosened. No open flames, sparking tools, or electrical switching happen near the work area while gas lines are open. Ventilation is maintained throughout the job.
Every gas joint we disturb is leak-tested under pressure before the heater is returned to service. This is not a quick glance; each connection is coated with leak-detection solution and watched for bubble formation, which reveals leaks far too small to smell. If a joint bubbles, it is disassembled and remade, not tightened and hoped over. The pilot is then lit according to the manufacturer's procedure and the burner is observed through a complete heating cycle, confirming stable flame, proper draft up the vent, and correct shutoff when the thermostat is satisfied.
Carbon monoxide awareness is part of every gas call. A malfunctioning gas valve can produce abnormal combustion, so we check for proper venting and draft, and we never leave a heater running with a compromised vent or a burner that will not burn cleanly. The temperature-pressure relief valve is tested as a matter of course, since overheating from a failed valve is one of the scenarios that makes the relief valve's job critical. If a gas odor is ever detected during the work, everything stops until the source is found and resolved.
Local Factors: Gas Valves in Medford Homes
Medford's gas water heaters live in conditions that shape how their valves age. A large share of local heaters are atmospheric-vent units installed in basements of homes built from the early 1900s through the 1960s, and many of those basements are damp. Moisture corrodes valve bodies, pilot assemblies, and thermocouple connections from the outside in, which is why we see more corrosion-related valve failures here than in drier regions. Triple-decker basements, where the heater shares space with laundry equipment and sits in a high-humidity environment, are particularly hard on gas-train components.
Age is the other factor. Medford's housing stock means plenty of heaters are running gas valves that are ten to fifteen years old, well into the range where internal thermostats drift and safety magnets weaken. Winter concentrates the failures: from December through March the heater cycles far more often against cold groundwater, and a marginal valve that limped through summer finally quits on the coldest week of the year. That seasonal pattern is why pilot and burner complaints spike in January and February.
The MWRA water supply plays a supporting role. Soft reservoir water is relatively kind to tanks, but it does nothing to slow the external corrosion of gas components in a damp basement, and sediment from older household piping can still clog pilot orifices and foul thermocouples. Serving Medford, MA 02155, we diagnose the complete gas train on every valve call, because in these basements the valve is guilty only about half the time, and the other half belongs to the thermocouple it works with.
Gas Control Valve FAQs
Gas valve symptoms overlap with several cheaper failures, which is why diagnosis comes first. These are the questions Medford homeowners ask when the pilot misbehaves or the burner goes silent, answered from what our testing actually finds.