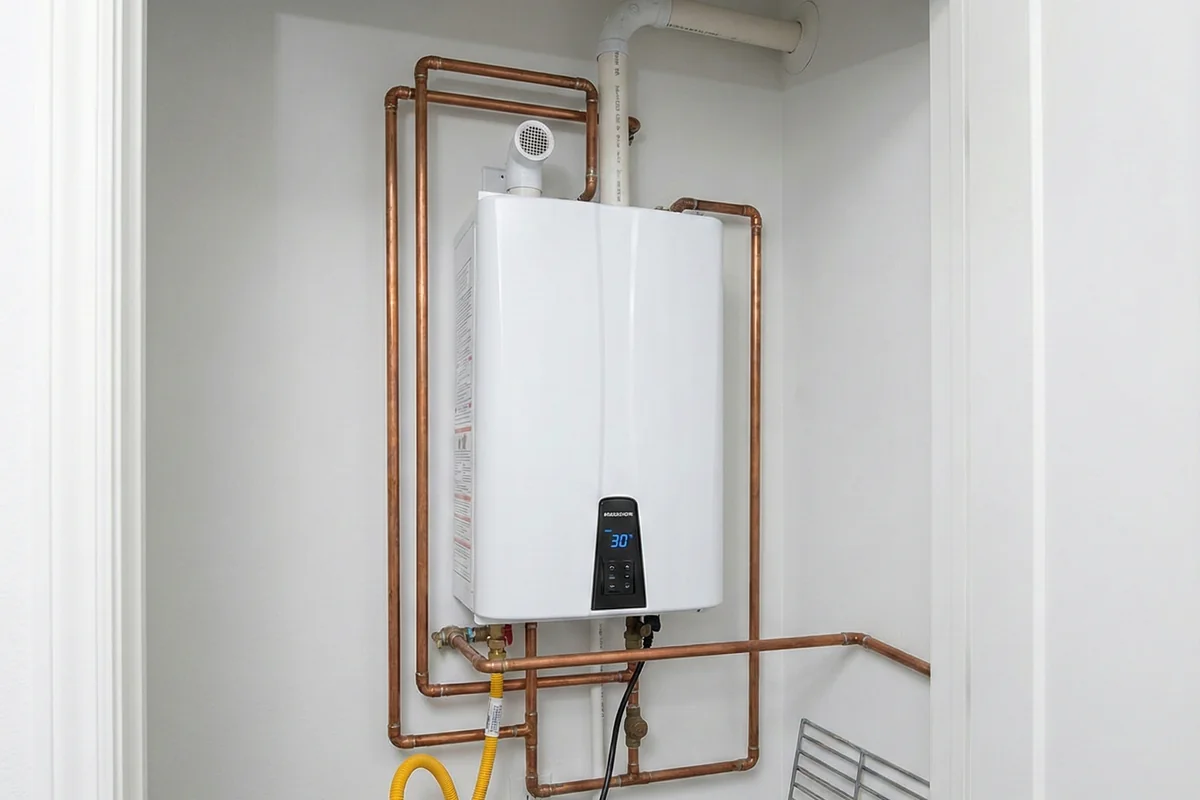
['A tankless water heater saves space and delivers hot water on demand, but it is still a pressurized plumbing appliance — and when one starts leaking in a Medford home, the damage does not wait. Because tankless units hang on walls, often in basements, utility closets, or garages, even a slow drip can run down the back of the unit and soak drywall, framing, and flooring before anyone notices. Catching the leak early is the difference between replacing a gasket and repairing a wall.', 'Tankless leaks behave differently from tank leaks. There is no big reservoir waiting to burst. Instead, water escapes from heat exchangers, pipe connections, pressure relief valves, or condensate lines, and each leak point tells a different story about what failed and how urgent the fix is. A weeping fitting might need only a new seal, while a cracked heat exchanger is a far more serious repair that calls for experienced judgment.', 'This page walks through the warning signs, the most common causes, exactly what happens during a professional repair visit, the tools and safety steps involved, and the Medford-specific factors — from hard freezes to triple-decker retrofits — that shape how tankless leaks happen here.']
Warning Signs and Common Causes of Tankless Leaks
A tankless leak rarely announces itself with a flood. More often it starts as a damp spot on the wall beneath the unit, a slow drip from a pipe joint, or a musty smell in the utility closet. Because these units are wall-mounted and compact, leaking water tends to run down the back of the cabinet and into the wall cavity or along the floor, where it can do quiet damage for weeks before it is spotted.
Watch for these warning signs:
- Water stains or drips below the unit. Any moisture on the wall or floor under a wall-hung tankless deserves immediate attention, not a wait-and-see approach.
- White or green crust on fittings. Mineral deposits around inlet, outlet, or relief-valve connections mark a slow, ongoing seep that has been evaporating and leaving minerals behind.
- Error codes or unexpected shutdowns. Many units display fault codes when sensors detect abnormal conditions tied to a leak or pressure loss.
- Fluctuating hot water temperature. A compromised heat exchanger can disrupt the steady, modulated heating the unit is designed to deliver.
- Musty or damp odors near the unit. Persistent moisture behind or beneath the cabinet feeds mold growth in enclosed utility spaces.
- Condensate drain overflow. On condensing models, water pooling from the condensate line signals a blockage, a cracked trap, or a disconnected hose.
Behind these symptoms, a handful of causes repeat. Heat exchangers develop pinhole leaks from years of thermal cycling and mineral attack on the copper or stainless tubing. Gaskets and O-rings harden and shrink with age until they no longer seal. Pipe unions and threaded connections loosen under constant expansion and contraction. In cold climates, any section of pipe or component holding water can split if it freezes — and tankless units hold far less water mass to buffer a freeze than a tank does, so they are less forgiving of freezing temperatures.
Condensate-related leaks deserve special mention. High-efficiency condensing tankless units produce acidic condensate as a normal byproduct of extracting extra heat from exhaust gases. If the condensate trap cracks, the drain line clogs, or the neutralizer cartridge is spent and crumbling, that water ends up where it should not be. Homeowners sometimes mistake this for a plumbing leak, but the fix is on the condensate side of the unit, not the water side.
What Happens During a Tankless Leak Repair Visit
A professional tankless leak repair follows a deliberate sequence. Skipping steps — especially the shutdown and verification steps — is how small leaks turn into scalding hazards or repeat callbacks. Here is the order a technician typically works through:
Step 1: Full shutdown and isolation
The water inlet valve is closed, the gas supply valve is turned off, and the unit is disconnected from electrical power. The technician verifies the unit is de-energized and depressurized before touching anything, because a tankless holds scalding water in its exchanger even when it is not firing.
Step 2: Controlled drain-down
Using the isolation and service valves installed on most units, the technician drains the heat exchanger and internal piping into a bucket. On older installs that lack service valves, water is drained through the lowest available connection, with towels and drop cloths protecting the floor.
Step 3: Leak source identification
With the unit open and drained, the technician inspects the heat exchanger, manifolds, and every fitting with a flashlight and inspection mirror. A pressure test of the water path confirms whether the exchanger itself holds pressure or weeps, and the condensate line and trap are checked for cracks or blockages.
Step 4: Component repair or replacement
Failed gaskets and O-rings are replaced with parts matched to the model. Loose unions are cleaned, resealed, and tightened to specification. A weeping pressure relief valve is replaced. Cracked condensate traps and spent neutralizer cartridges are swapped out. If the heat exchanger itself is split, the technician lays out the options honestly, including when replacement of the unit makes more sense than an expensive exchanger swap.
Step 5: Descaling flush
While the unit is open, a descaling solution is circulated through the heat exchanger with a small pump to dissolve mineral buildup. This step both improves efficiency and removes the scale that accelerates pinhole corrosion — addressing a root cause, not just the symptom.
Step 6: Restart and verification
The unit is refilled, air is purged from the lines, and gas and power are restored. The technician fires the unit, runs hot water, and checks every joint with a dry tissue — the simplest and most reliable leak test there is. Condensate drainage is watched through a full heating cycle, and the display is confirmed clear of error codes before the visit is considered complete.
Tools and Materials Used in Tankless Leak Repair
Tankless leak repair sits at the intersection of plumbing and appliance service, so the toolkit reflects both trades. A well-equipped technician arrives with:
- Isolation and service valve kits — added to units that were installed without them, so future service does not require draining the whole house.
- Descaling pump and food-grade descaling solution — for circulating cleaner through the heat exchanger without harsh chemicals.
- Model-matched gasket and O-ring kits — generic seals do not belong inside a heat exchanger; the parts must match the unit.
- Copper and PEX fittings, thread sealant tape, and pipe joint compound — for resealing or replacing compromised connections.
- Replacement pressure relief valves — rated to the unit's specifications, never a hardware-store guess.
- Condensate neutralizer media and replacement traps — for condensing models with acidic condensate issues.
- Manometer and multimeter — to verify gas pressure and electrical integrity after the repair.
- Moisture meter, flashlight, and inspection mirror — for finding the true source before any part is replaced.
- Buckets, towels, and drop cloths — because even a controlled drain-down puts water where floors need protection.
The quality of the parts matters as much as the labor. A heat exchanger gasket that is almost the right size will weep again within months, which is why technicians order by model and serial number rather than grabbing whatever fits from a truck bin.
Safety Precautions for Tankless Leak Work
Tankless units combine gas or high-voltage electricity with scalding water in a compact cabinet. Respecting that combination is non-negotiable:
- Shut off gas before servicing gas units. If you smell gas at any point, stop work, leave the area, and call your gas utility's emergency line — do not try to find the leak yourself.
- Disconnect electrical power. Gas tankless units still use 120-volt power for controls and freeze protection, and electric tankless units run on 240 volts. The breaker stays off until the work is done.
- Let the unit cool. Water inside a heat exchanger can exceed 140 degrees long after the unit stops firing. Draining a hot unit risks serious scalds.
- Never cap or plug the pressure relief valve. A dripping relief valve is a symptom. Blocking it turns a nuisance drip into a pressure vessel with no safety outlet.
- Keep venting intact. Never run a gas tankless with disconnected or damaged venting — combustion gases, including carbon monoxide, must have a clear path outside.
- Handle condensate with care. Condensing-unit condensate is mildly acidic. Avoid prolonged skin contact, keep it out of eyes, and rinse any spills from finished surfaces.
- Remember freeze protection needs power. A tankless unit's built-in freeze protection only works while it has electricity. During a winter power outage, the unit is unprotected — a fact that matters enormously in Medford, as explained below.
These precautions are part of why tankless leak repair is professional work. The margin between a routine gasket swap and a dangerous mistake is entirely about procedure.
Medford and Greater Boston Factors That Affect Tankless Leaks
Medford's housing stock and climate give tankless leaks a local character that a generic repair guide misses. Understanding these factors helps explain both why leaks happen here and how they are prevented.
Soft MWRA water changes the scale equation. Medford's drinking water comes from the Massachusetts Water Resources Authority system, sourced from the Quabbin and Wachusett reservoirs and treated at the Carroll Water Treatment Plant. It is naturally soft, low-mineral water, which means scale accumulates in heat exchangers far more slowly than in hard-water regions. Descaling still matters — manufacturers recommend it regardless — but Medford tankless owners fight corrosion and freeze damage far more often than they fight heavy scale.
Triple-decker retrofits put units in vulnerable spots. South Medford, the Wellington area, and the streets around Medford Square are dense with triple-deckers built from the 1890s through the 1920s. When these homes convert to tankless, the unit often lands wherever space allows: an exterior basement wall, an unheated garage, or a utility closet with minimal insulation. Every one of those locations increases freeze exposure compared to a conditioned mechanical room.
Nor'easter outages defeat freeze protection. This is the big one. A tankless unit's internal freeze protection — small heaters that warm critical components — requires electricity. When a winter storm knocks out power for hours or days, the unit sits cold and full of water. Residual water in the heat exchanger freezes, expands, and splits copper tubing or fittings. The leak only reveals itself when power and water return. Homeowners who lose power in January or February should have their tankless inspected before assuming it survived.
Cold inlet water works condensing units harder. In deep winter, Medford's incoming water can arrive near 40 degrees. The unit must add far more heat per gallon, which means longer, hotter firing cycles and — on condensing models — significantly more acidic condensate. That extra condensate volume puts more load on the trap, neutralizer, and drain line all winter, which is why condensate leaks cluster in the cold months.
Condensate drains must not freeze. A condensate line routed to an exterior termination, a hose bib, or an unheated crawlspace can freeze shut in January. With nowhere to go, condensate backs up and overflows inside. Proper installs terminate the drain at a laundry sink, floor drain, or other interior point that stays above freezing.
Older gas infrastructure needs verification. Many Medford homes still run on the gas piping installed decades ago for a tank heater or boiler. A high-BTU tankless can demand more gas flow than those lines comfortably deliver, causing pressure drops that stress the unit. A thorough repair visit includes checking that gas supply is adequate — not just fixing the drip and leaving.
Tankless Leak Questions From Medford Homeowners
The questions below cover what Medford homeowners ask most when a tankless unit starts leaking — from winter freeze damage to whether a leaking unit can be saved. Each answer reflects how these units actually fail in local homes. If your situation is not covered here, call (833) 713-2101 and describe what you are seeing; a local pro can usually tell from a short description whether you need a scheduled repair visit or something more urgent.