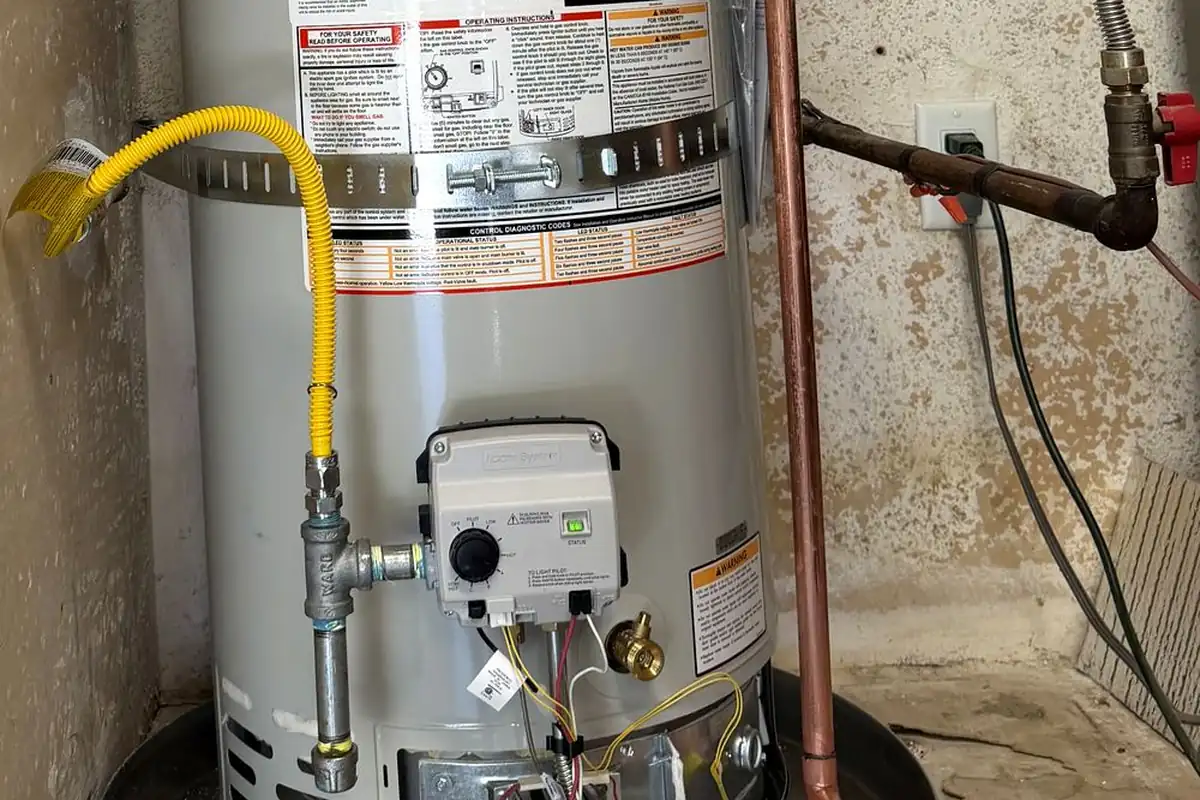
["A water heater drain pan is one of the least glamorous and most valuable components in a home's plumbing — a simple metal or plastic tray that sits under the tank and catches the slow seeps, weeping valves, and fitting drips that would otherwise soak silently into flooring for weeks. Nobody admires their drain pan. Everybody wishes they had one the first time a water heater leaks onto a finished floor.", 'Pans matter most where the consequences of a leak are highest: water heaters installed above finished living space, in attics, in upper-floor closets, or in finished basements. Plumbing codes generally require pans in exactly these situations, because a leak above a finished ceiling does not just waste water — it destroys drywall, flooring, and everything beneath it. Even where a pan is not strictly required, it is inexpensive protection against the most common kind of water heater leak: the slow one nobody notices.', 'Installing a pan correctly involves more than sliding a tray under the tank. The pan must be sized to the heater, the heater must be set level inside it, and — critically — the pan needs a drain line that actually carries water somewhere safe. This page covers when pans are needed, the installation process step by step, the materials involved, the safety considerations, and the Medford-specific factors, from finished basements to freezing drain lines, that shape pan installs here.']
Signs You Need a Drain Pan — or a Better One
Many Medford homes have water heaters sitting directly on the basement floor with no pan at all — standard practice decades ago, inadequate today. Here is how to tell whether your installation needs a pan or a better one:
- No pan under the current heater. The most common situation in older Medford homes. If you can see bare floor under your tank, you have no leak containment whatsoever.
- The heater sits above finished space. Any heater in an attic, an upper-floor closet, or above a finished basement ceiling needs a pan — this is the highest-risk configuration.
- A pan exists but has no drain. Surprisingly common: a tray was installed but never connected to a drain line. It fills once and overflows, providing false confidence.
- Cracked or undersized pan. Thin plastic pans crack under tank weight over time; a pan narrower than the tank plus two inches cannot catch drips from the tank's edge.
- Rust stains on the floor around the heater. Staining proves water has been escaping and going exactly where a pan would have caught it.
- A previous leak caused damage. If a past leak damaged flooring or drywall, the lesson has already been taught once — a pan ensures it is not taught twice.
- Landlord or insurer requirements. Rental properties and some insurance policies in multi-unit buildings require leak containment under water heaters.
The underlying causes are straightforward: water heaters leak most often as slow seeps from drain valves, fittings, and aging seams — precisely the leaks a pan is designed to catch. And as Medford homeowners finish more basements into living space, heaters that once leaked onto bare concrete now leak onto laminate, carpet, and drywall. The pan that was optional in 1985 is essential in the finished basement of today.
How Drain Pan Installation Works, Step by Step
Pan installation is usually bundled with a water heater replacement, when the tank is already being disconnected and moved. As a standalone retrofit it follows the same steps with more labor. The professional sequence:
Step 1: Assess the site and size the pan
The technician measures the tank's diameter and selects a pan at least two inches wider, in aluminum or heavy-duty plastic. The drain termination point is identified — floor drain, laundry sink, sump pit — and the drain line route is planned with continuous downward slope.
Step 2: Shut down and disconnect the heater
Water, gas or power, and venting are disconnected following standard safety procedure. The tank is drained through a hose to make it light enough to move safely.
Step 3: Move the heater and prep the floor
Using an appliance hand truck, the tank is moved aside. The floor area is cleaned and checked for level — an unlevel floor gets shims later, because a tilted pan drains poorly and a tilted tank strains its connections.
Step 4: Set the pan and position the tank
The pan is placed, leveled with shims if needed, and the tank is lowered into it, centered with even clearance on all sides. The tank must sit flat in the pan, not rock on its edge.
Step 5: Run the drain line
A drain line — typically three-quarter-inch PVC or CPVC — is run from the pan's drain fitting to the termination point, maintaining downward slope along the entire run with no sags where water could sit. The line is secured and its termination left visible so drainage can be confirmed.
Step 6: Add leak detection
A battery-powered water alarm is placed in the pan. On higher-value installs, an automatic shutoff valve on the water inlet may be added — it closes the supply when the sensor detects water, stopping a leak at its source.
Step 7: Reconnect, refill, and prove the drain
The heater is reconnected, refilled, and restarted. Finally, the technician pours water directly into the pan and watches it flow out the drain line — the only proof that matters that the system works as designed.
Materials for a Proper Pan Installation
A pan installation uses ordinary plumbing materials assembled with care. The standard list:
- Drain pan — heavy-gauge aluminum or rigid plastic, sized at least two inches larger in diameter than the tank, deep enough to hold a meaningful volume.
- PVC or CPVC pipe and fittings — three-quarter-inch minimum for the drain line, with elbows and straps for a clean, sloped run.
- Water leak alarm — battery-powered sensor with an audible alert; smart models add phone notifications.
- Automatic shutoff valve (optional but recommended) — closes the cold-water inlet when the sensor gets wet.
- Shims — composite or plastic, for leveling the pan on uneven basement floors.
- Appliance hand truck and straps — for moving the drained tank safely.
- Garden hose and bucket — for draining the tank before the move.
- Pipe joint compound and thread tape — for reconnecting water lines after the tank is reset.
The pan itself is the cheapest part of the job. The value is in the drain line routing and the alarm — the components that turn a tray into a system.
Safety Considerations for Pan Installation
Pan installation involves moving a heavy appliance and breaking into water, gas, and electrical connections. The safety checklist:
- Respect the tank's weight. Even drained, a water heater is heavy and awkward; full of sediment, heavier still. Two people and a proper hand truck — never a solo carry down basement stairs.
- Disconnect utilities before moving. Water, gas or power, and venting are fully disconnected before the tank shifts an inch. A dragging gas flex line or live wire turns a simple move into an emergency.
- Protect the gas connection. Flexible gas connectors should not be kinked, stretched, or reused if damaged. When in doubt, it gets replaced.
- Keep the drain line freeze-safe. A pan drain routed to an exterior termination can freeze shut in a Medford January — a blocked pan drain is no drain at all. Interior terminations are strongly preferred.
- Do not compromise the TPR discharge. Resetting the tank must not disturb the temperature and pressure relief valve's discharge piping. If the discharge was deficient before, the reset is the moment to correct it.
- Maintain the alarm. A water alarm with a dead battery is a plastic paperweight. Test it yearly and replace batteries on schedule.
- Watch for asbestos-era materials. In Medford's oldest homes, disturbing old pipe insulation or floor tiles during a pan install can encounter hazardous materials — if suspect material is present, work stops until it is assessed.
None of these risks are exotic. They are the ordinary hazards of moving a connected appliance, managed through ordinary care — which is exactly what a professional visit provides.
Medford Factors That Shape Pan Installations
Medford's housing and climate shape pan installations in specific ways.
Finished basements are the driving force. Across Medford — from the capes of West Medford to the colonials of the Hillside — homeowners are finishing basements into family rooms, offices, and playrooms. A water heater that once leaked onto bare concrete now sits beside drywall and carpet. In these homes, a pan with a working drain and an alarm is not optional equipment; it is the barrier between a minor service call and a five-figure restoration.
Triple-deckers concentrate the risk. In South Medford and around Wellington, triple-deckers often place the water heater in a basement utility area directly below finished first-floor living space — or, in some layouts, in a closet within a unit itself. A leak here damages the unit below or beside it, potentially affecting neighbors and landlords alike. Pans are standard practice in these configurations.
Stone foundations complicate drainage. Many Medford basements sit on fieldstone foundations with no floor drain — the floor is simply concrete (or dirt, in the oldest homes) graded toward nowhere in particular. Running a pan drain in these basements often means routing to a laundry sink, a sump pit, or a condensate pump. The sump pits common in neighborhoods near the Mystic River floodplain do double duty here, providing a ready termination point.
Exterior drain terminations freeze. Routing a pan drain through the foundation wall to daylight outside seems tidy until January, when the termination freezes shut and the next leak fills the pan with nowhere to go. Medford's extended subfreezing stretches make interior terminations — floor drains, sinks, sumps — the only reliable choice.
Second-floor and attic installs need pans most. Less common but present in Medford's converted condos and dormered capes: water heaters tucked into upper-floor closets or attic spaces. Here a pan is not just wise but generally required, because any leak rains directly onto finished rooms below. These installs also get leak alarms as a matter of course, since nobody visits the attic weekly.
Soft MWRA water, slow seeps. Medford's naturally soft MWRA water means less sediment and fewer sudden tank failures than in hard-water regions — but slow seeps from aging drain valves and fittings are just as common. Those are precisely the leaks pans are built for: the quiet, months-long drips that a pan catches and an alarm announces.
Drain Pan Questions From Medford Homeowners
Below are the questions Medford homeowners ask most about water heater drain pans — when they are needed, what they can and cannot do, and how the drain and alarm work together. If your heater sits above finished space with no pan beneath it, call (833) 713-2101 and a local pro can tell you what your installation needs.