['Water on the basement floor near your water heater triggers an immediate fear: the tank is dying, and a flood is coming. Sometimes that fear is justified. But seasoned technicians know that a surprising share of water heater leak calls turn out to be something else entirely — a weeping fitting, a dripping relief valve, condensation on a cold tank, or water migrating from nearby equipment. The difference between a modest repair and a full replacement often comes down to one thing: accurate detection before anyone picks up a wrench.', 'Guessing wrong is expensive in both directions. Replace a water heater over a leaking drain valve and you have spent thousands solving a fifty-dollar problem. Patch fittings on a tank with a failing seam and you have bought weeks, not years, before the real failure arrives. Detection is the discipline of finding the true source — where the water is actually escaping, not just where it ended up.', 'This page covers where water heater leaks really come from, the step-by-step detection process professionals use, the instruments involved, the safety rules for working around a leaking heater, and the Medford-specific conditions — from stone foundations that wick groundwater to humid summers that make tanks sweat — that complicate leak diagnosis here.']
Where Water Heater Leaks Really Come From
Water is a traveler: it drips from the actual failure point, runs along pipes and jackets, and pools wherever gravity leaves it. The puddle's location is a clue, not a verdict. Here are the real sources, roughly in order of how often they are found:
- Drain valve. The small spigot at the tank's base weeps when its washer hardens or sediment prevents it from seating. Water appears at the very bottom of the tank.
- Inlet and outlet fittings. The hot and cold connections at the tank's top loosen over years of thermal cycling. Look for green corrosion or white mineral crust at these joints.
- TPR discharge pipe. A weeping relief valve sends water down its discharge pipe to the floor — the tank is fine, the valve or system pressure is the issue.
- Tank seam or weld failure. The serious one. Water seeping from under the jacket or from a visible seam, often rust-colored, means the tank wall itself is compromised.
- Condensation (sweating). Cold incoming water plus warm, humid basement air coats the tank's exterior with moisture that drips to the floor. Common in summer, harmless in itself.
- Anode rod or element ports. The threaded ports on top of the tank can weep when gaskets age, mimicking a fitting leak.
- Nearby equipment. Washing machine hoses, softener drains, AC condensate lines, and sump discharges all share basement space with water heaters and all produce water.
- Groundwater. In older Medford basements, water seeping up through the floor near the heater is a foundation issue, not a plumbing one.
The warning signs that point specifically at the tank: rust-colored hot water at the tap, a rumbling or popping tank (sediment accelerating corrosion), visible rust streaks running down the jacket, and moisture that reappears at a seam after everything has been dried. Fitting leaks, by contrast, show mineral crust at a joint and respond to tightening or resealing.
One more distinction that matters: a leak that worsens right after the heater fires and eases when it idles suggests pressure-related weeping (fittings, relief valve). A leak that flows steadily regardless of heating cycles suggests a structural breach in the tank wall. Observing the leak's rhythm is free diagnostic information.
The Step-by-Step Leak Detection Process
Professional leak detection is elimination work — ruling suspects out in order until only the true source remains. The sequence:
Step 1: Make everything dry
The technician wipes down the tank, all fittings, valves, and the surrounding floor. Detection cannot begin on a wet scene; every surface must start dry so that new moisture is meaningful.
Step 2: The paper towel test
Dry paper towels or newspaper are wrapped around suspect fittings and laid on the floor around the tank's base. After a waiting period — sometimes with hot water drawn to cycle the heater — the towels reveal exactly where water first reappears. This humble test solves a remarkable number of cases.
Step 3: Fitting and valve inspection
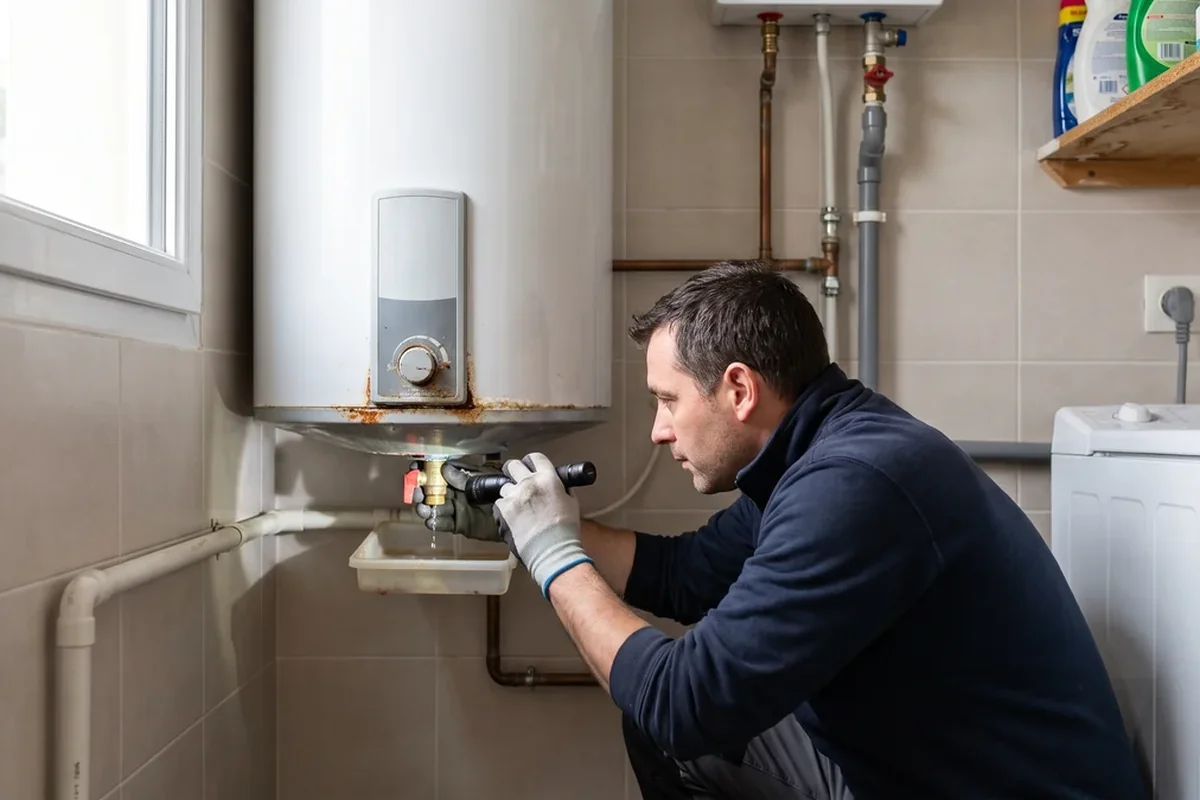
Every connection is examined with a flashlight: inlet, outlet, drain valve, TPR valve and its discharge pipe, anode port, element covers. Mineral crust, green corrosion, and rust streaks are read like a map — each deposit marks water's path.
Step 4: Instrument sweep
A moisture meter checks the floor and nearby walls for hidden dampness beyond the visible puddle. A thermal imaging camera scans the tank jacket and surrounding area for cool patterns indicating active moisture behind surfaces. These instruments find what eyes cannot, especially in finished or cluttered basements.
Step 5: Pressure and operation check
System water pressure is measured — high pressure implicates fittings and the relief valve. The heater is cycled: hot water is drawn, the burner or elements fire, and the technician watches whether the leak responds to heating. A dye tablet in a drain pan or a food-coloring test can trace a specific path conclusively.
Step 6: Expand the search if needed
If the heater proves dry, the investigation moves outward: washing machine connections, nearby drain lines, the foundation floor itself. A good technician says so plainly when the heater is innocent — selling a replacement for a foundation seep helps no one.
Step 7: Document the finding
The confirmed source is photographed and explained: what failed, why it failed, and whether the fix is a repair or a replacement. That documentation also serves the homeowner if an insurance claim enters the picture.
Instruments Used to Find the Source
Leak detection rewards the right instruments. The professional kit includes:
- Pin and pinless moisture meters — for quantifying dampness in floors, walls, and the tank jacket's surroundings without guesswork.
- Thermal imaging camera — for revealing active moisture patterns behind the jacket and inside wall cavities through evaporative cooling signatures.
- High-intensity flashlight and inspection mirror — for seeing behind and beneath the tank where leaks hide.
- Paper towels and newspaper — the simplest, most decisive leak-location tool in existence.
- Dye tablets or food coloring — for tracing a suspected path conclusively, especially around drain pans and discharge pipes.
- Water pressure gauge — for identifying the high-pressure conditions that cause fitting and relief-valve weeping.
- Bucket, hose, rags, and drop cloths — for managing water during testing and keeping the work area safe underfoot.
What matters more than any single instrument is correlation: moisture meter readings, thermal patterns, visual deposits, and pressure data all pointing at the same source. One instrument can mislead; four agreeing rarely do.
Staying Safe Around a Leaking Water Heater
A leaking water heater combines water, electricity or gas, and sometimes scalding temperatures. The safety baseline:
- Electricity and standing water do not mix. Never touch a leaking electric heater's panels or wiring with wet hands or while standing in water. If water reaches electrical components, the breaker goes off first.
- Shut down a badly leaking heater. For a major leak: close the cold-water inlet, switch off the breaker (electric) or turn the gas control off (gas). Do not drain the tank unless directed — an empty electric tank with power on destroys elements almost instantly.
- Beware scalding discharge. Water escaping near the top of the tank or from the relief valve can be hot enough to burn. Keep hands and face clear during inspection.
- Gas units need ventilation awareness. If the leak has extinguished the pilot or the burner area is wet, do not attempt relighting repeatedly. Let a technician assess whether the gas controls are compromised.
- Watch your footing. A wet concrete basement floor is a slip hazard, especially on painted or sealed concrete. Contain and mop as you work.
- Consider what the water touched. Water that has sat in a leaking tank area can carry rust and sediment; keep it away from finished surfaces and clean up promptly to prevent staining and mold.
Most detection visits are calm, dry affairs — a small drip, a methodical search, a clear answer. The safety rules exist for the minority of cases where a leak is already serious when the technician arrives.
Medford Factors That Complicate Leak Detection
Medford's basements and climate add layers to leak detection that do not exist in newer suburbs. Local knowledge prevents misdiagnosis.
Stone foundations wick groundwater. Many Medford homes — especially the triple-deckers of South Medford and the older colonials near Medford Square — sit on fieldstone or rubble foundations. These foundations breathe and wick: during wet springs or after heavy rain, groundwater migrates through mortar joints and seeps up through the floor, often pooling right where the water heater stands. A technician who does not know this replaces water heaters for foundation seeps. The tell: water that appears after rain, with every fitting on the tank bone dry.
Humid summers make tanks sweat. July and August bring warm, humid air into Medford basements while incoming water stays cold. The temperature difference condenses moisture on the tank's exterior — sometimes enough to form genuine puddles. Homeowners discover this in the morning and assume the worst. Seasonal timing and the paper-towel test separate sweating from leaking.
Winter amplifies real leaks. Cold inlet water means longer, harder heating cycles from December through March, and every cycle stresses weakened fittings and seams. Small seeps that were stable in September often declare themselves in January. Detection visits spike in midwinter for this reason.
Soft MWRA water changes the corrosion story. Medford's water supply, delivered by the Massachusetts Water Resources Authority from the Quabbin and Wachusett reservoirs, is naturally soft and low in minerals. Heavy sediment buildup is less common here than in hard-water regions — but the anode rod still depletes, and once it is gone, tank corrosion proceeds regardless of water softness. Rust-colored water in a Medford home usually means an exhausted anode, not sediment.
Tight, cluttered basements hide evidence. Century-old Medford basements pack the water heater behind furnaces, beside washers, under low ducts. Leaks in these obstacle courses travel along pipes and appear feet from their source. Thermal imaging earns its keep in exactly these spaces, seeing around the clutter that blocks a visual inspection.
Neighborhood housing patterns matter. In West Medford's capes and ranches, heaters often sit in small utility closets where any leak is immediately visible — detection is quick. In the Hillside's larger colonials with sprawling basements, a slow leak can run across the floor and pool far from the tank, sending the search in the wrong direction initially. The detection process adapts to the house.
Leak Detection Questions From Medford Homeowners
These are the questions Medford homeowners ask most when water appears near their heater — how to read the signs, what to do first, and when a puddle means replacement. If you are looking at water right now and cannot tell where it is coming from, call (833) 713-2101: describing the color, location, and timing of the water usually lets a local pro narrow it down before the visit.