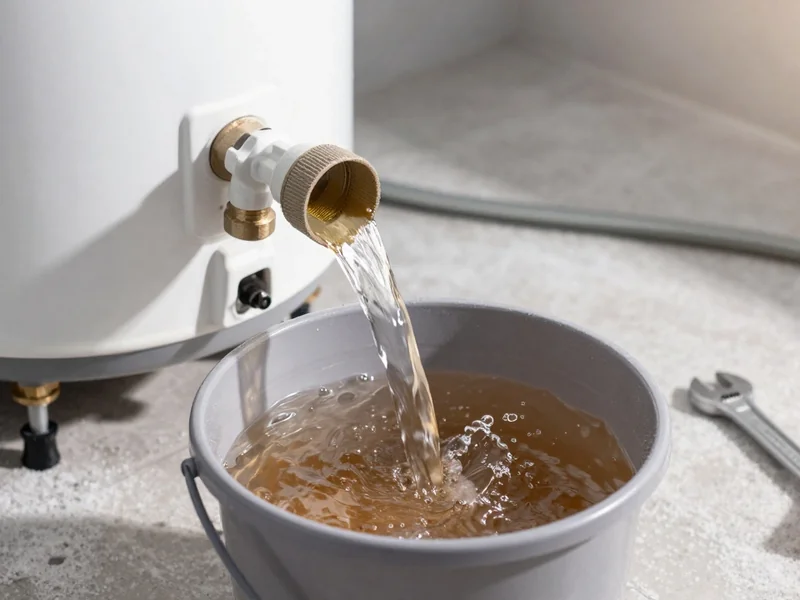
At the bottom of your water heater tank sits a small brass or plastic spigot that most Belmont, MA 02478 homeowners touch exactly twice in a tank's life: never, and then urgently. That is the drain valve, and it has two jobs. It lets a technician drain the tank for flushing out sediment, and it lets the tank be emptied for service or replacement. Factory-installed valves are often cheap plastic gate valves that go brittle with age and heat. They seize shut, snap off when forced, or weep constantly once disturbed. We replace failed drain valves with full-port brass ball-valve drains: a permanent upgrade that opens with a quarter turn, drains fast, and does not become the reason a simple flush turns into an emergency. If the valve on your Belmont tank drips, will not open, or will not close, the valve is the problem, and it is a fixable one.
What the Drain Valve Does and Why It Fails
The drain valve is the tank's service port. Every sediment flush, every element replacement, every tank swap starts at that valve: attach a hose, open it, and the tank empties. The problem is what manufacturers install there. Most residential tanks ship with a plastic drain valve, a cost-saving part threaded into a steel tank port. Years of heat cycling make the plastic brittle. Mineral deposits cement the washer in place. The first time anyone touches it, often a decade after installation, the handle snaps off in your hand, or the valve opens halfway and then refuses to close, or it weeps steadily from the stem. None of this means the tank is bad. It means a ten-dollar-grade part reached the end of its life.
Corrosion attacks from the outside too. In damp basements the valve body and the tank port threads corrode together, and the valve effectively welds itself to the tank. Forcing it is how valves break off flush with the port, which turns a valve swap into an extraction job. Our replacement is a full-port brass ball valve with a hose-thread outlet: quarter-turn operation, a bore nearly the full diameter of the pipe so sediment actually exits instead of clogging, and brass that will still turn freely in ten years. It is the part the factory should have installed, fitted after the fact.
Signs Your Drain Valve Needs Replacing
The clearest sign is a valve that drips or weeps from the spout or the stem, especially after anyone has touched it. A slow drip from the drain valve is one of the most common mystery puddles under a water heater, and homeowners often mistake it for a tank leak. If the puddle is directly beneath the valve and the tank shell is dry, the valve is almost certainly the culprit. A second sign is a valve that will not open at all. You attach a hose for a flush, put a wrench on the handle, and nothing moves, or the handle crumbles. That valve is seized, and forcing it risks snapping it off.
Other warning signs are subtler. A valve that opens but only trickles, even with full tank pressure behind it, is clogged with sediment packed into the small plastic bore, which also tells you the tank is overdue for a flush. Visible green or white crust on a brass valve body, or rust streaks running down from the valve onto the tank jacket, means the valve-to-tank joint is corroding. And any valve with a missing or broken handle is a valve you cannot operate in an emergency, which defeats its entire purpose. All of these are valve problems with valve solutions. The tank does not need to be replaced to fix any of them.
Draining a Tank Above Finished Flooring
Replacing a drain valve in a Belmont finished basement is a logistics exercise first and a plumbing job second. The tank has to be drained, which means fifty gallons of water must travel from the heater to a discharge point without touching finished flooring, baseboards, or the home office carpet. When the old plastic valve is seized or weeping, that controlled drain is exactly what is at risk, because a valve that cannot be operated cannot be trusted to behave during the job. We plan the hose route before we arrive, protect the path, and in finished basements we often recommend pairing the new brass valve with a drain pan plumbed to a proper drain, so the next decade of the tank's life has a containment layer the current setup lacks.
The valve failures we see in Belmont follow the housing eras. In the Victorians and older two-families, original plastic valves have gone brittle after decades of heat cycling, and the mixed galvanized-copper systems have often corroded the valve-to-tank threads into a single seized mass. In the 1950s ranches, valves sit in crawl-space or slab-adjacent locations where they are hard to reach and easy to ignore until they fail. In both cases the upgrade is the same full-port brass ball-valve drain, but the access plan and the containment plan are Belmont-specific, and we quote them that way.
Dirt Floors, Seepage, and Valves That Fail Silently
Belmont's oldest homes present a failure mode most homeowners never consider: the leak that disappears. In a pre-1900 basement with a stone foundation and a dirt floor, a weeping drain valve does not form a puddle; it drains straight into the soil. The homeowner finds out months later, if at all, when the tank's performance drops or the valve fails completely. Low-lying areas near Beaver Brook add periodic seepage to the picture, which keeps valve bodies damp and accelerates external corrosion. During a valve replacement visit in these homes, we inspect not just the valve but the tank base and the surrounding soil moisture pattern, because chronic dampness at the base is often the first visible sign of a problem the dirt floor has been hiding.
Soft MWRA water helps here in one specific way: with minimal scale, a new full-port brass valve stays operable for years, and flushing through it actually clears the light sediment that Belmont tanks accumulate. We flush as part of the valve visit and leave the homeowner with a valve that works, a pan recommendation where the basement is finished or the floor is dirt, and a straight answer about the tank's remaining life. The goal is that the next time this tank needs attention, the valve is the easiest part of the job, not the reason for an emergency call.
What Happens When You Call
When you call (833) 713-2101, describe what the valve is doing: dripping, seized, broken handle, or stuck open. We will tell you what not to touch before we arrive, because a half-open valve on a hot tank is not a DIY moment. On site, our technician shuts off water and power or gas to the heater, lets the tank cool to a safe temperature, and drains it through whatever function the old valve still has, or through the relief valve line if the drain valve is completely dead. We extract the old valve, clean and inspect the tank port threads, and thread in the new full-port brass ball-valve drain with proper sealant. Then we refill the tank, purge air from the hot water lines, restore heat, and test the new valve open and closed in front of you so you can see it work.